The “Super Mario All-Stars” disassembly

Few people from a rather niche ROM hacking scene probably noticed one of my biggest projects on GitHub suddenly ended up as a 404 sometime ago. Namely, the Super Mario All-Stars (“SMAS”) disassembly. I made the repository private for a few reasons, which I’ll mention later. Earlier I talked with spel werdz rite (SWR) and we agreed that I transfer the ownership of the entire project and the repository to him. The short version of this post is that the repository can now be found at https://github.com/Maseya/SMAS-Disassembly. It’s not my responsibility anymore.

How it all started

The disassembly started out as a side project besides my usual SMW hacking activities back in the days. I figured it would be really awesome to hack my childhood favorite game(s). Seeing that nobody on SMWCentral was really doing anything with SMAS, I attempted making a level editor inspired by Lunar Magic. I had only a few weeks of C# experience back then, so of course, that project quickly got nowhere.

I did say “nobody on SMWCentral”, but it’s worth mentioning that there were some documents floating around on the internet, written by Insectduel. These documents were related to level and overworld data for Super Mario Bros. 1 and Super Mario Bros. 3. He credited spel werdz rite multiple times for finding that information.

A while after that failed project, I came up with the idea of starting a disassembly, inspired by SMW’s “all.log”. At some point it dawned on me that disassemblies can’t be missed for ROM hacking. After all, thanks to all.log, we kept discovering new, previously undocumented RAM addresses. The same could be accomplished for SMAS.

Disassembling the ROM

After recruiting a few SMWC members for this project – Alcaro, Roy, imamelia – the project got started. Alcaro mainly made us an essential tool. It would format the debugger output of the SNES9X debugger to the well-known all.log format. Because, indeed, we used the SNES9X debugger to disassemble the ROM. We would use the disassemble function, copy paste the output into this tool, then manually sift through the code to see if there was anything strange (e.g. tables disassembled as instructions).

To my knowledge, there were no good SNES disassemblers back then. The only way I knew how to disassemble ROMs then was by using the “disassemble” function of the SNES9x debugger. The output was very consistent but also very prone to errors. It wasn’t smart and couldn’t distinguish code from tables, nor be able to infer if A, X or Y were 16-bit or 8-bit status. I do want to make a “smart” disassembler one day. It’s definitely on my todo list!

Results

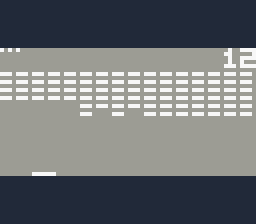
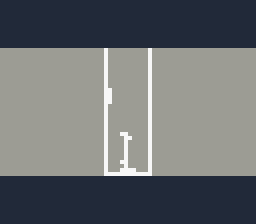
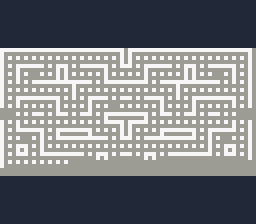
I don’t remember how long it took. I think it took us about 1 year to finally finish the disassembly and get to the more exciting part: documenting stuff. For this, I made a dedicated website at https://smas.ersan.io/. Side-note: the layout is made by Counterfeit and I still think it’s absolutely gorgeous to this day. Nowadays, I keep the website archived. I don’t add new addresses anymore, as the maps are now hosted over at SMWCentral. Thanks to the newfound info, this was definitely possible:

From a Very Popular Creepypasta™

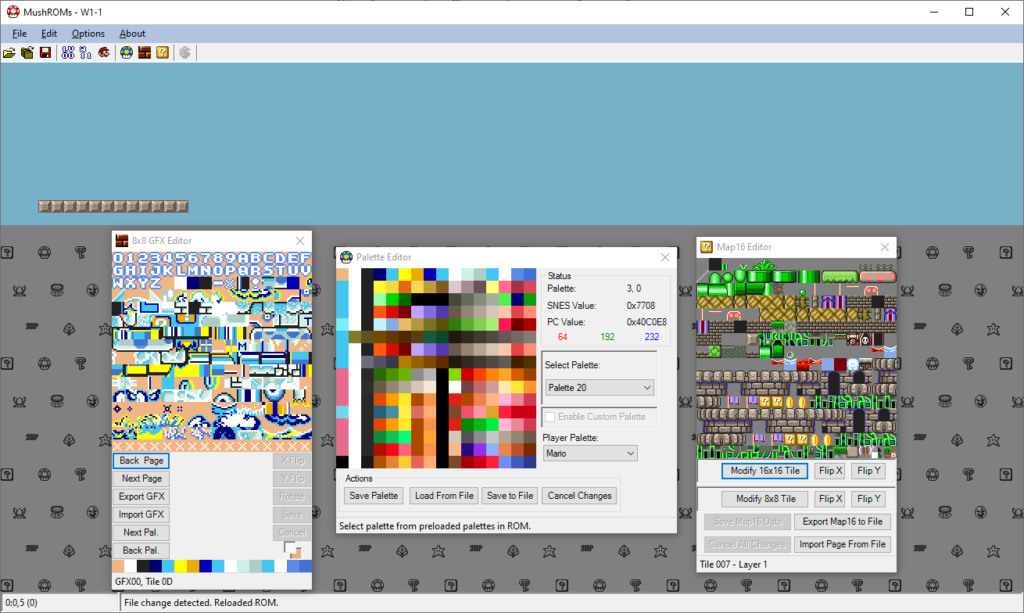
Meanwhile, SWR, started a new project called “MushROMs” which initially started out as a SMAS editor, but continually grew into a set of general-purpose SNES ROM hacking libraries. It’s been a while since the last update, but it would be cool to see this finished as well.

SWR was very focused on drawing performance. This screenshot makes use of BitmapData in an unsafe context. Eventually, he switched over to OpenGL
One of the more working examples of MushROMs

Stagnation

Eventually, the SMAS disassembly slowly came to a halt. The documenting just didn’t happen anymore, and for me, the project consumed a lot of valuable time. Time I needed at the university at that time. Also, despite people expressing their interest in this project being finished, it was really just me, imamelia, Roy and eventually SWR working on the project. Speaking for myself only, it wasn’t very motivating to see people being interested, yet nobody really contributing to see their interest actually being completed. Even after putting it on GitHub, I think over the course of 4 years, only two people actually contributed something new to the code.

Fast forward to today. Aside from a bit of formatting and the composition of the repository, no new progress has been made in documenting. There are about 600 RAM addresses on SMWCentral still waiting in moderation for a few years straight now. I feel bad about it, but I truly don’t have the time nor motivation to moderate those addresses anymore (and I should probably just relinquish my position as a “SMAS ASM moderator” on SMWCentral). I have a full-time job now. I have my own ambitions as a software engineer, and I simply can’t afford to work on this project anymore. As people say, “time is money” and I’d rather spend my time learning new skills to build my career, rather than work on a project I’m not interested in and has very little merit for me to finish it. My circumstances have changed I suppose. As a result, I went from “it would be cool to see ROM hacks of SMAS!” to “time is money, so it’s time to move on”.

Finally, the recent “giga leak” of various Nintendo source codes gave me a bit of a moral dilemma. This is a big topic in itself, but to keep it short, I just didn’t want such a questionable project in my repository anymore. I was basically hosting source code that didn’t belong to me, in my GitHub repository. The fact that the giga leak contained source code of SMAS just reinforced this thought, thus I distanced myself from that repository.

Conclusion

As I mentioned at the start of this post, I handed over the repository to SWR. He gladly accepted the responsibility, thus I can finally conclude this project. Even though we made good progress, for me personally, it’s just too much to handle at this point of life. My ambition just sort of got killed by various factors as time passed by. However, I think it would be cool to see the project and a fully-functional MushROMs finished one day, just because of the immense effort various people put in them. It would be interesting to finally see some big results come into fruition.

The making of my SNES assembly tutorials

I’ve been meaning to write a post after releasing the most recent version(s) of my assembly (ASM) tutorials, but never got around to it until now. Here’s a shameless plug of the tutorials in question:

Ersanio’s ASM Tutorial – Assembly for the SNES (v2.3)

Ersanio’s ASM Tutorial – Assembly for Super Mario World (v1.1)

If you’re an SNES ASM hacker, chances are that you’ve heard about these. So yeah, I’m the author (if that wasn’t obvious already, hehe).

Here’s a picture of an outdated physical version which I printed out with the remainder of my high school printer credits before graduating back then. Gotta put that money to use somehow!

History and idea

“Ersanio’s ASM Tutorial” is an idea I came up with all the way back during my highschool years. SMWCentral’s archives show that my very first ASM tutorial thread was made in November 2008. I was 16 back then.

I learned ASM because of people like Ghettoyouth and Bio. They were pumping out incredible ASM work and it really fascinated me. I didn’t know a thing about programming but I was set on learning ASM anyway. However, there was a problem: because the ASM field was rather young, documentation was difficult to find.

After a lot of searching on the internet, as well as repeatedly asking for help from people who knew ASM, I finally learned ASM myself. It was a tough journey but in the end it all worked out. Yet, I was still a bit bothered by how scattered the information was. I saw people who are willing to learn ASM, but had hard times because of how information was scattered. At the same time, I felt bad for people who knew ASM because I’m sure they’d be bombarded with ASM-related questions… including myself. That is how I came up with the idea of making an ASM tutorial. In a way, I wanted the people to experience my passion as well, so this tutorial would be some kind of a helping hand for people who wish to learn ASM.

Writing my ASM tutorials

Writing my ASM tutorial was actually challenging, because the target audience are people who don’t know ASM. It’s very hard to imagine the things the audience doesn’t know because you yourself know ASM already, so some of the knowledge is “common sense” to you as the writer. This kind of tutorial is one which teaches the audience a “skillset” rather than a “utility”; if I were to write a custom block inserter tutorial instead that would’ve been easy, because the tutorial would be about how the tool works. It teaches the reader a “routine”. On the other hand, teaching a skillset such as ASM is like telling the reader that there’s a bunch of abstract concepts and you need to somehow combine them to achieve a result.

This shouldn’t come as a surprise, but first and foremost, when you write a tutorial, make absolutely sure that there are no mistakes whatsoever. You wouldn’t want to teach the reader false information. This is the most important rule I followed.

When I started writing my ASM tutorial, I simply wrote a bunch of topics as chapters (kind of in the order I learned them), then started filling them with content. I asked for a lot of feedback from people who both know and didn’t know ASM which was a huge help.

There was a balance I needed to keep while writing the tutorial. When I wrote the ASM tutorial, I wanted to exactly explain what happened behind the scenes when you execute a certain piece of code, but this has the risk of making the tutorial extremely verbose, as well as introducing advanced concepts very early on in the tutorial. Here’s an example of seemingly simple code which could suffer from that problem:

LDA #$01
STA $19
RTS

In the context of Super Mario World, this is simply giving the player the Mushroom powerup status. But what happens behind the scenes in ASM is much more complicated:

  • A is in 8-bit mode
  • The direct page register is $00
  • The data bank register is $00
  • What is RTS? Return? To where?
  • The processor flag ‘zero’ is cleared

This is a lot of information to introduce to a beginner so I had to keep it to the bare essentials, often simplifying such information to things like “when the address is between $7E0000-$7E00FF, you can simpify it to $00 to $FF” because this is the most common use case scenario of direct page.

Another important thing to keep in mind when teaching a skillset is the usage of examples. You could write down a lot of facts, but without examples it wouldn’t stick around the reader. It’s a chance to get the reader involved and make them think about code. Visual aid can also be helpful, such as a visual representation of the stack.

Interestingly enough, having a good vocabulary also helped me improve my ASM tutorial a lot. An extensive vocabulary helps you with conveying information in a more understandable language. In the beginning my English wasn’t the greatest, but that didn’t stop me from writing the initial versions of my ASM tutorial. As my English improved, I found that some of the things I have written were of poor quality. I essentially ended up almost entirely rewriting my ASM tutorial because of this, but I think it was very worth it.

Future

Very recently I came across this online book sort of thing: Model-Based Machine Learning. Machine learning is interesting in itself but what interested me more is the format of this book. I really like how you can just click through the book and how it’s organized. I’m not sure if they used some kind of tool to generate this online book, but maybe I’ll put my ASM tutorials in this format as well one day even if I have to do it manually.

Closing words

I would like to believe that my ASM tutorials were of great contribution to SMWCentral. However, I didn’t expect it to be recommended in other communities as well. p4plus2 and Raidenthequick mentioned how my tutorials are being used in other communities as well and I was really amazed by this.

I think it’s safe to say that both of these ASM tutorials are my proudest work in my hobby of ROM hacking.

DEFLATE on the Super Nintendo Entertainment System

I’ve been meaning to write this post for a while now, but I never got around to it until today.

Recently, p4plus2 and I released a new SNES project – an inflate algorithm for the SNES. It is capable of decompressing DEFLATE files, and the code is some serious wizardry.

Without further ado, here’s the C3 thread:
http://www.smwcentral.net/?p=viewthread&t=94324.
In here are all the data we found as well as a brief explanation of the format and possible applications.

And the repository link:
https://github.com/Ersanio/SNES-Inflate/

How the idea came to be

Before last C3, I came up with the idea of porting a certain piece of 6502 code to the 65c816, i.e. Super Nintendo Entertainment System. It’s an inflate algorithm written by Piotr Fusik. A few years ago (really), p4plus2 linked me this and I forever stashed it in my “projects to do” list, not really understanding what DEFLATE really does. At least, until very recently.

After my latest semester I’ve learned about graphs and trees and this is exactly what DEFLATE uses – a Huffman Tree. I finally started to understand what DEFLATE really is and found lightweight tools to compress data so now I have things to test. I told p4plus2 about the idea of porting DEFLATE to the SNES and he told me he’s been wanting to do this also, so this became some kind of a collaboration project. Ultimately, I wanted to implement this in Super Mario World as I know that some hack collabs suffered from ROM space issues. There are solutions (such as bankswitching using the SA-1) but solving the problem without any enhancement chips sounded more challenging.

The initial approach

At first, I thought it’d be a matter of  “porting an old processor’s opcodes to its successor’s opcodes” which would give it some kind of a performance boost simply by utilizing newly-added opcodes, so you wouldn’t need to “beat around the bush” anymore when you wanted something done. For example, the 6502 doesn’t have stack instructions for the index registers, so you would need to transfer the index registers to A first, then push that using PHA. That’s two steps for a push. In the 65c816, you can simply use PHY or PHX. The first thing I did was making sure the 6502 code worked on the SNES without any optimizations whatsoever. This worked, but then p4plus2 took this project to the next level.

Benchmarking decompression algorithms

p4plus2 has ways to measure code performance on the SNES by using a custom-built SNES debugger. He measured them in “clocks” and we used a compressed GFX00.bin as our test file.

The ported 6502 code used 7415572 clocks (~21 frames). 21 frames might not seem a lot but consider the fact that I want to port this to Super Mario World. Super Mario World can load up to 11 graphics (GFX) files per level, so that’d be roughly 231 frames, give or take a few depending on how well the files are compressed. That’s almost 4 seconds on the level loading screen just for decompressing GFX files. The original SMW decompression algorithm (LC_LZ2) already bothered me to the point of initiating a very successful ASM collab to optimize the LC_LZ2 algorithm.

By p4plus2’s request, I made a bunch of “wrapper” homebrew ROMs which ran various decompression routines on GFX00.bin. I compressed GFX00.bin into LC_LZ2 and LC_LZ3 and ran three decompression algorithms on it: SMW’s original LC_LZ2 decompressor, the highly optimized LC_LZ2 decompressor and the LC_LZ3 decompressor which was based on the highly optimized LC_LZ2 decompressor. p4plus2 benchmarked the ROMs (including the ported 6502 inflate code) and got the following results:

PERFORMANCE: Decompressing GFX00.bin
lz2 (original)	1638070 clocks
lz2 (optimized)	599616 clocks
lz3		1041172 clocks
DEFLATE 	7415572 clocks

The results kind of scared me. The inflate routine would need a LOT of optimizations. What’s more, p4plus2 recommended that we just start over from scratch so that we would have full control over the code. Making small changes would require us to make many changes in several places in the source code sometimes. To check if this project is worth it at all, I decided to compare DEFLATE to other formats.

Comparing various compression formats

(Admittedly I should’ve done this step before even starting the project. What if the compression format was inferior?)

I compressed all the GFX files of SMW in DEFLATE using zopfli and compared them in other compressed formats in order to see if DEFLATE is a superior compression format or not.

The results were incredible as the compression format beat even LC_LZ3 which is considered an “upgrade” of LC_LZ2:

As you can see, DEFLATE saves hundreds of bytes compared to LC_LZ3. When you count all GFX files, DEFLATE saves 0x4A53 bytes total compared to LC_LZ3, which is a HUGE improvement within the context of SNES ROM space. It’s funny to see the compression graphically as well:

In LC_LZ2 you can still see some of the original graphics just slightly distorted. LC_LZ3 is even more distorted. Then you have DEFLATE which is just… a garbled mess. You can see that every single byte is processed one way or another, thanks to the Huffman coding.

Code with momentum

p4plus2 decided to rewrite the routine from scratch and I applaud his fortitude. As I still have trouble understanding DEFLATE I mostly had a supporting role including finding optimization points in the code, suggesting edits, minor optimizations to his code and pretty much brainstorming with him in general.

At first, p4plus2 wrote the code unoptimized but in such a format that it would be easy to reformat it to an optimized form later. Many existing implementations generated the static tree dynamically in the RAM but we decided to just put the static tree in the ROM. After applying many optimization tricks, we got the code down to 4753212 clocks, from 7695346. It still doesn’t beat the previously mentioned decompression routines,  but it’s one hell of an improvement.

Optimization tricks

p4plus2 already had experience with optimizing SNES code as he worked on a few TASbot projects before, which also required insane amounts of optimizing. Most of the optimization was pretty ‘basic’, such as unrolling loops, inline functions rather than function calls, direct copy being DMA’d rather than block moved and switching around branches so that they are taken less often. We also removed some obsolete opcodes (such as CLC/SEC) which required a bit of code analyzing and experimenting.

The most interesting optimization tricks used are messing around with the stack pointer and honestly I think that’s entering black magic territory. Take a look at this code:

An inexperienced ASMer would immediately notice that there’s a pull without a push. That would cause the program to crash! …But there are strings attached. First of all, this entire code is in 16-bit mode as mentioned earlier. Second, code_length_codes is a table with 16-bit values and the stack pointer is set to that. As the stack pointer is a 16-bit value, it can also point to bank 00 of the ROM. Finally, PLX increases the stack pointer by +2 (as we’re in 16-bit mode). As a result, this code reads out the bytes and stores them in the RAM addresses defined in the code_length_codes table. Every PLX is basically shorthand for a bunch of instructions which read out code_length_codes, transferring it to the X register, then increasing the code_length_codes index by 2. This is quite the extreme (and clever!) optimization but it was possible as the stack wasn’t used in this area.

The second extreme optimization also involves the stack pointer register as well as a bit of the direct page register. There’s no stack pulling magic here, however.

This routine is the main bottleneck of inflate. It’s called hundreds of times so it only makes sense to optimize this routine as much as we can, even if it means shaving off 1 cycle at a time.

First, we used the direct page register to clear the accumulator because it’s always nice to assume the direct page register is set to 0000h. Then we basically used the stack register for scratch RAM purposes. It’s faster than using actual scratch RAM. A TCS/TSC takes two cycles while doing an “LDA $dp” or “STA $dp” in 16-bit mode takes four. Also, a TDC takes two cycles while an “LDA #$0000” takes three. Because the routine gets called hundreds of times, the optimizations are pretty much hundreds of cycles!

Future projects

With the recent developments on the SA-1 chip thanks to Vitor Vilela and his SA-1 pack, the possibility of an SA-1 port is very real. This would mean that the inflate code could run even faster with minimal modifications to the code itself. What’s more, inflate could be optimized even more with a barrel shifter and SA-1 just happens to have one.

Personally I would also like to make a SuperFX port of inflate so that the Yoshi’s Island community would be able to benefit from the compression, although compression tests show that LC_LZ16’s compression is superior in some cases. I don’t think this will hold me back, though. As I don’t fully understand the DEFLATE format yet, I plan to write inflate in C# first to grasp the essentials of the decompression algorithm. After I truly understand how inflate works, I could give the SuperFX version a serious attempt. I know that if I were to write one right now, with my current knowledge, all I would do is take the SNES code and port it to SuperFX like some kind of a tool.

Closing words

This is possibly the grandest SMW hacking ASM projects I’ve worked on so far. I’m really glad that me and p4plus2 worked on this project together. If I tried this solo, I would’ve simply ported the 6502 code and called it a day (but the project technically would’ve been successful)!

There were so many steps involved. It wasn’t a matter of “oh I got the idea to code LevelASM, I’ll just code it real quick” but it actually required careful planning, experimenting and a solid understanding of the algorithm.

In my opinion, this project is very revolutionary for SNES ROM hacking in general and I hope that other people will find even more optimization points. Furthermore, I hope that FuSoYa officially implements this in Lunar Magic once there’s a working SA-1 port.

Thanks to p4plus2, I learned new (optimization) tricks for the SNES. I also confirmed my suspicions that he is an actual wizard.

A Chip-8 emulator for the Super Nintendo Entertainment System

Update: Code snippets are now in Gist.

Oh hey. It has been ~2 years since my last post. Guess it’s time to bring a change to this.

So yeah, I coded a Chip-8 emulator for the SNES. You can view the project here:

https://github.com/Ersanio/Super-Chip8x

And here is the playable SNES ROM!

The namesake is inspired by “Snes9x” (I never knew what the 9x really meant). I didn’t want to simply call it Super Chip-8 because there’s a variant of the Chip-8 called SCHIP (Super Chip) and it could cause confusion, and conveniently enough the name already had a number so I just stuck an “x” at the end.

How the idea came to be

Writing a (crude) SNES emulator has always been on my wishlist – so I started doing research on the SNES as well as emulation in general. Google seems to have taken notice of my emulation-related searches. During my daily routine of checking the Google app for stories to read, it suggested to me this certain article:

Writing a CHIP-8 emulator with Rust and WebAssembly

Upon seeing the title alone, I had three questions in mind: “What is Chip-8”, “what is Rust” and “what is WebAssembly”? I looked into the former and found out it’s basically some sort of a “fantasy video game console”. That immediately made me forget about the latter two questions.

I seem to have a soft spot for emulation, assembly and old/retro consoles in general. So when I read about the Chip-8 I noticed how simple it was (it’s considered the “hello world” of emulation) and I got really into the idea of writing an emulator for this. Then I found out there’s already like a thousand emulators for this. It was then that I had this impulsive thought: The Chip-8 is so simple, it could probably run even on the SNES. Amused by my own idea, I set up the project directory.

Setting up the project

To work on this project, all I needed are three tools:

  • A text editor: Notepad++
  • An assembler: asar
  • An accurate emulator/debugger: bsnes-plus

I also needed proper Chip-8 documentation, so I used “Cowgod’s Chip-8 Technical Reference“.

And… that’s about it. The rest was up to my coding and problem-solving skills.

Actual coding

Prior to this project, I had never finished a SNES homebrew ROM before. The greatest extent of my homebrewing is activating the screen and displaying things, but in terms of gameplay or controller inputs, I did nothing. This was going to be a whole new experience. I decided to approach this project in my own way – take a really safe approach and define every RAM address, and (almost) every magical number. I also decided to not optimize the code, because I think I would’ve lost control over my code really fast if I did that from the very beginning already.

The display of the Chip-8 is 64×32. The display of the (NTSC) SNES is 256×224 by default. p4plus2 gave me the idea to make the screen mode 7. It has a very simple graphics format (1 byte per pixel basically) and you can scale the screen, so I could make the Chip-8 display 256×128. People won’t have to squint their eyes when using the emulator, at least. Because the (scaled up) horizontal resolution is a perfect 256 pixels wide, I decided to use HDMA to color the screen boundaries.

In order to emulate the Chip-8, I had to allocate some RAM for its registers.

These are all in the SNES direct page (except for the memory), which would allow for slightly faster access to the registers.

I also allocated some RAM for opcode parameters. Each opcode could be ‘dissected’ into 6 variables: The opcode itself and 5 parameters. All of these variables are filled in regardless of the opcode currently being processed.

Inside the main game loop, I added a subroutine call to an opcode parser. Because every opcode is exactly two bytes, it was a matter of reading an opcode, then increasing the program counter by 2 to get to the next instruction.

I made use of a pointer table which is used by !Opcode. Each opcode will have its own function, but there are certain opcodes which act as a ‘container’ for another group of opcodes. The greatest example is opcode $08 – “Arithmetic”. The SNES – in my opinion – is pretty okay with pointer tables, and I had no problems with making yet another pointer table for those specific container opcodes.

My biggest problem was thinking of a proper solution for the Chip-8 input. Officially, the system has sixteen keys. The SNES only has twelve and you can’t use all 12 for conventional input. Start and select are in the middle of the controller and you’ll have to reach them with your thumb, forcing you to stop using the D-pad or the ABXY buttons. This leaves you with 10 buttons, and there’s no real way to divide 16 buttons over 10 buttons.

Then I got the idea of using button combinations. You could map the 16 keys to the ABXY buttons by using button combinations with the L+R buttons:

  • ABXY
  • L+[ABXY]
  • R+[ABXY]
  • LR+[ABXY]

However, using this controller scheme for every single ROM would be very as awkward and uncomfortable. So I got the idea to make a custom controller scheme for every playable ROM.

It involved extra work, but in the end, it was worth it. Technically the emulator supports all 16 keys, but at the same time, you can set intuitive controls for each playable ROM.

Closing words

In the end, I am surprised at myself for being able to complete this project at all. I think the very idea of coding an emulator for the SNES kept me going on. Personally, I think it’s a pretty crazy idea.

SMWCentral’s C3 event was also nearing so I thought it was the perfect opportunity to finish a project and show it off to everyone.

The fact that I can tell people that I coded an emulator for the SNES, no matter how simple the Chip-8 system may be, is something that I can be proud of.