Update: Code snippets are now in Gist.
Oh hey. It has been ~2 years since my last post. Guess it’s time to bring a change to this.
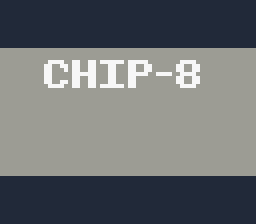
So yeah, I coded a Chip-8 emulator for the SNES. You can view the project here:
https://github.com/Ersanio/Super-Chip8x
And here is the playable SNES ROM!
The namesake is inspired by “Snes9x” (I never knew what the 9x really meant). I didn’t want to simply call it Super Chip-8 because there’s a variant of the Chip-8 called SCHIP (Super Chip) and it could cause confusion, and conveniently enough the name already had a number so I just stuck an “x” at the end.
How the idea came to be
Writing a (crude) SNES emulator has always been on my wishlist – so I started doing research on the SNES as well as emulation in general. Google seems to have taken notice of my emulation-related searches. During my daily routine of checking the Google app for stories to read, it suggested to me this certain article:
Writing a CHIP-8 emulator with Rust and WebAssembly
Upon seeing the title alone, I had three questions in mind: “What is Chip-8”, “what is Rust” and “what is WebAssembly”? I looked into the former and found out it’s basically some sort of a “fantasy video game console”. That immediately made me forget about the latter two questions.
I seem to have a soft spot for emulation, assembly and old/retro consoles in general. So when I read about the Chip-8 I noticed how simple it was (it’s considered the “hello world” of emulation) and I got really into the idea of writing an emulator for this. Then I found out there’s already like a thousand emulators for this. It was then that I had this impulsive thought: The Chip-8 is so simple, it could probably run even on the SNES. Amused by my own idea, I set up the project directory.
Setting up the project
To work on this project, all I needed are three tools:
- A text editor: Notepad++
- An assembler: asar
- An accurate emulator/debugger: bsnes-plus
I also needed proper Chip-8 documentation, so I used “Cowgod’s Chip-8 Technical Reference“.
And… that’s about it. The rest was up to my coding and problem-solving skills.
Actual coding
Prior to this project, I had never finished a SNES homebrew ROM before. The greatest extent of my homebrewing is activating the screen and displaying things, but in terms of gameplay or controller inputs, I did nothing. This was going to be a whole new experience. I decided to approach this project in my own way – take a really safe approach and define every RAM address, and (almost) every magical number. I also decided to not optimize the code, because I think I would’ve lost control over my code really fast if I did that from the very beginning already.
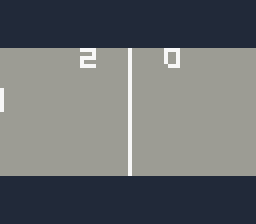
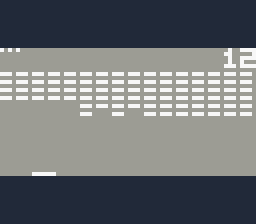
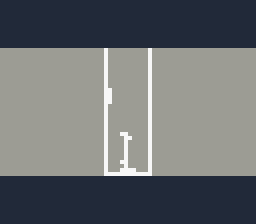
The display of the Chip-8 is 64×32. The display of the (NTSC) SNES is 256×224 by default. p4plus2 gave me the idea to make the screen mode 7. It has a very simple graphics format (1 byte per pixel basically) and you can scale the screen, so I could make the Chip-8 display 256×128. People won’t have to squint their eyes when using the emulator, at least. Because the (scaled up) horizontal resolution is a perfect 256 pixels wide, I decided to use HDMA to color the screen boundaries.
In order to emulate the Chip-8, I had to allocate some RAM for its registers.
These are all in the SNES direct page (except for the memory), which would allow for slightly faster access to the registers.
I also allocated some RAM for opcode parameters. Each opcode could be ‘dissected’ into 6 variables: The opcode itself and 5 parameters. All of these variables are filled in regardless of the opcode currently being processed.
Inside the main game loop, I added a subroutine call to an opcode parser. Because every opcode is exactly two bytes, it was a matter of reading an opcode, then increasing the program counter by 2 to get to the next instruction.
I made use of a pointer table which is used by !Opcode. Each opcode will have its own function, but there are certain opcodes which act as a ‘container’ for another group of opcodes. The greatest example is opcode $08 – “Arithmetic”. The SNES – in my opinion – is pretty okay with pointer tables, and I had no problems with making yet another pointer table for those specific container opcodes.
My biggest problem was thinking of a proper solution for the Chip-8 input. Officially, the system has sixteen keys. The SNES only has twelve and you can’t use all 12 for conventional input. Start and select are in the middle of the controller and you’ll have to reach them with your thumb, forcing you to stop using the D-pad or the ABXY buttons. This leaves you with 10 buttons, and there’s no real way to divide 16 buttons over 10 buttons.
Then I got the idea of using button combinations. You could map the 16 keys to the ABXY buttons by using button combinations with the L+R buttons:
- ABXY
- L+[ABXY]
- R+[ABXY]
- LR+[ABXY]
However, using this controller scheme for every single ROM would be very as awkward and uncomfortable. So I got the idea to make a custom controller scheme for every playable ROM.
It involved extra work, but in the end, it was worth it. Technically the emulator supports all 16 keys, but at the same time, you can set intuitive controls for each playable ROM.
Closing words
In the end, I am surprised at myself for being able to complete this project at all. I think the very idea of coding an emulator for the SNES kept me going on. Personally, I think it’s a pretty crazy idea.
SMWCentral’s C3 event was also nearing so I thought it was the perfect opportunity to finish a project and show it off to everyone.
The fact that I can tell people that I coded an emulator for the SNES, no matter how simple the Chip-8 system may be, is something that I can be proud of.